Your RAID Advanced Freediver Course Joining Instructions
This course page confirms that you’ve booked your RAID Advanced Freediver cour
Please follow our step by step guide to prepare for the practical elements of your course.
ALL STEPS ARE COMPULSORY. Please ensure you complete each step before moving on.
Welcome to your RAID Advanced Freediver Course! This course has been specifically designed to ensure as much of the admin and theory is completed prior to attending the practical (open water) elements of the course. This means you can learn and absorb the theory behind advanced freediving at at time and pace comfortable for you. It also allows you more time in the water when you arrive with us – which is always a benefit!
You will find some information will be from our original RAID Freediver course. This will not only help refresh your memory (or if you have had a break for a while, update you with latest practices) for your course, but will remain an excellent resource for you.
Please follow all the steps provided and check our handy FAQ section at the end for the most popular questions we get asked about this course.
Please remember that you must have a Lanyard for the course, you can contact u to purchase one if you don’t already have one.
We look forward to seeing you in the water very soon!

Make Go Freediving a Safe Sender (if you have not already done so)
To ensure our emails are not blocked or directed to your spam folder, please add emma@gofreediving.co.uk and info@gofreediving.co.uk to your ‘safe sender’ and contacts list on your email account.
If you have gmail, here’s how to do that:
- On your computer, go to Google Contacts.
- At the top left, click Create contact.
- Click Create contact or Create multiple contacts.
- Enter the contact’s information.
- Click Save
If you have any social media pages, why not give us a follow at the same time (we’ll follow you right back) and become part of our friendly online freediving community – another great way to keep up to date with any information we need (or love) to share!
By now you should have:
- Made us a safe sender on your email account
- Registered for your FREE Breathing Optimisation Class (optional).
Let’s Get Kitted Up!
(Even if you have your OWN kit, you MUST complete the Kit Hire form as there is additional information, such as next of kin etc, we need to know about. It also lets us know that you haven’t forgotten to reserve kit with us.)
At Go Freediving our hire kit is treated with the care and attention it deserves. Each item is cleaned and stored in optimum condition so you can be assured the kit you are given for your course is safe, functional and clean! Even our wetsuits get superstar treatment! On the first day of your course you will be given the hire kit you have pre-ordered and it will be yours for the duration of the course
To book your hire kit
(or to advise us you don’t need any)
please complete this form:
https://forms.gle/qDHfv49ffgULT14y8
Don’t forget! We also sell full kit bundles, wetsuits and individual items. If you would like to purchase any kit for your course, please get in touch at info@gofreediving.co.uk with sizes and requirements and we will get back to you as soon as possible with options and pricing.
By now you should have:
- Made us a safe sender on your email account
- Registered for your FREE Breathing Optimisation Class (optional).
- Submitted your Kit requirements and next of kin details
Medical and Admin
The following documents need to be completed and submitted immediately so that you have enough time to have your medical questionnaire signed off by a doctor if required. Not everyone has to have the form signed off by a doctor, please refer to the instructions below and on the medical questionnaire.
IMPORTANT!
If you answer ‘yes’ to any of the Medical Statement questions, you’ll need to get clearance from your GP before taking the course. Make sure your GP is clear that you’re freediving and not scuba diving as there can be a difference – we’re happy to talk to your GP if necessary. Also, as these medical certificates are only valid for 6 months unless otherwise specified, we would recommend asking your GP to add a ‘valid until XXX’ reference (usually a year or two) to allow you longer medical approval and extending the period of your certificate at no extra cost.Please also note; if you say ‘yes’ to the question ‘Are you over 45?’, this is only a preliminary question, you would need to be over 45 AND have one of the additional conditions listed further down the page before being required to have a doctor sign you as fit to dive.
Here are the FOUR forms you need to print, complete, sign and UPLOAD as soon as possible.
RAID Freediving Liability Release & Assumption of Risk Agreement
RAID Declaration of Safe Diving Practices and Statement of Understanding
Please upload your completed documents
HERE
By now you should have:
- Made us a safe sender on your email account
- Registered for your FREE Breathing Optimisation Class (optional).
- Submitted your Kit requirements and next of kin details
- Completed all of your medical and admin paperwork
Let’s Dive In!
When you join our course you have to register in two places:
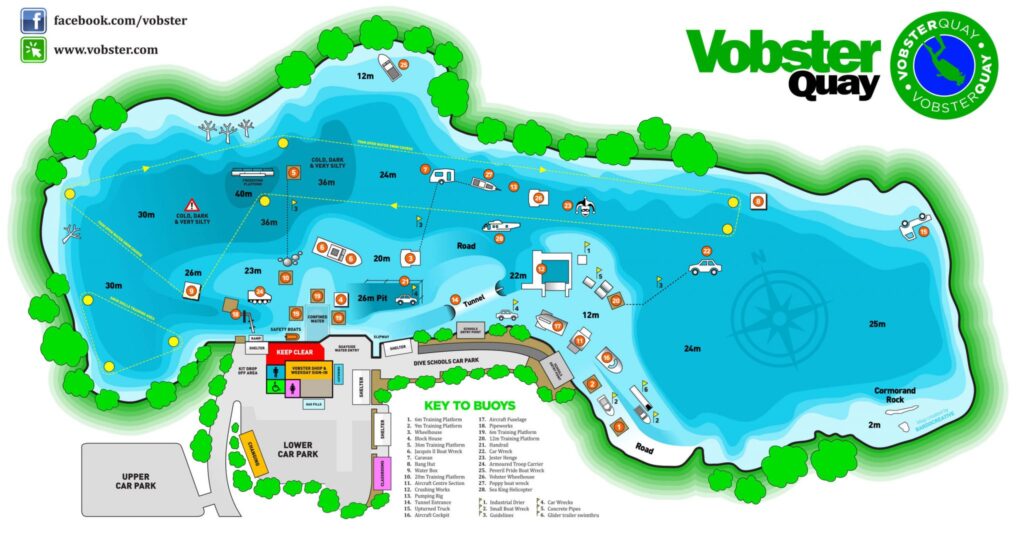 1. Vobster Quay
Vobster Quay requires each student to register online and in advance, for the dates they are attending their course to ensure they manage site capacity appropriately.
Go Freediving currently has premier dive school status so can make these bookings up to two months in advance.
We will email your unique BOOKING LINKS as soon as they are available. You will receive a different link for each day. This is why it is vital to make us a safe sender
How to register if you are not a member of Vobster Quay (this will be most people taking a course):
1) Go to your unique BOOKING LINK
2) Under NEW VISITOR click REGISTER
3) Follow all the instructions to create an account and accept their terms and conditions
You will only need to register once when booking day 1, for day 2 you can choose a registered member when you open the link. Please make sure you log out between each link.
How to register if you are a member of Vobster Quay:
1) Go to your unique BOOKING LINK
2) Under REGISTERED VISITOR insert the email address associated with your Vobster membership
![]() 2. RAID – for your course materials
2. RAID – for your course materials
All course materials and the majority of the theory work for your RAID Freediver course is online. The online theory and knowledge check MUST be completed before you undertake the practical elements of your course.
If you arrive for your course without having completed the online theory work and passed the final knowledge check, for safety reasons you will not be allowed into the water.
Please note that on the morning of your course you will be required to complete a mini quiz to ensure that your knowledge is up to date.
Registering with RAID
In order to complete your theory work and access your course materials you will need to register an account on RAID
For some students, you will already have registered an account when you undertook your RAID course with us. If this applies to you, you can move directly to accessing your course materials by logging in to RAID here
We are also aware that some students have difficulty registering with RAID when using Chrome as not all the tick boxes are visible, for this reason, we recommend that you use Firefox or Safari as a browser when accessing this site.
To Register:
- Select Register in the toolbar at the top of the page and follow the instructions to create your account.
- When you’re logged in, select My Profile and then Change My Personal Details.
- Upload a PASSPORT STYLE picture of yourself. If you don’t add an image, you will not be issued with a card upon completion of your course.
- Next, select View or Change My Dive Centre and choose United Kingdom and Go Freediving. This enables us to appoint an instructor to certify your training and view your progress with the theory work.
Accessing Your RAID Advanced Freediver Course materials
- Once you have registered and selected Go Freediving as your dive centre, please let us know at: info@gofreediving.co.uk so we are able to credit your account with the RAID Freediver course. This may take up to 24 hours.
- You can then select it from My Courses.
- Select Go To Course to begin working through the theory. The theory and practical sections will be shown, along with sub-sections that include a Quick Quiz that must be completed in order to progress to the final knowledge check
- You can also access your course manual here for viewing, download or printing. The Quick Quizzes should be completed with the manual, so there’s no need to remember everything!
- After reading the manual and completing the Quick Quizzes you can access the final knowledge check. Remember: You MUST pass your knowledge check BEFORE your course weekend – you won’t be allowed to enter the water without completing it.
If you have difficulty accessing the manuals from a mobile device they can be downloaded here. However, we cannot guarantee that these versions will be up to date, so suggest they are only used for reference until you are able to access your course materials.
WSF Freediver Manual 1 – Environment
WSF Freediver Manual 2 – Physiology
WSF Freediver Manual 3 – Rescue
WSF Freediver Manual 4 – Management
WSF Freediver Manual 5 – Confined Water Training
WSF Freediver Manual 6 – Open Water Training
By now you should have:
- Made us a safe sender on your email account
- Registered for your FREE Breathing Optimisation Class (optional).
- Submitted your Kit requirements and next of kin details
- Completed all of your medical and admin paperwork
- Registered with Vobster and Registered with RAID to access your course materials
You’re Almost Set To Go!
So let’s just double check everything. We don’t want to leave you at the gates of Vobster!
Please take a look at this checklist to make sure you have done everything you need to. You can also find this form, further down the page.
Need Accommodation?
There are plenty of places to stay the night between the two days of the course, whether you prefer cheap and cheerful camping or hostelry, or something a little more luxurious.
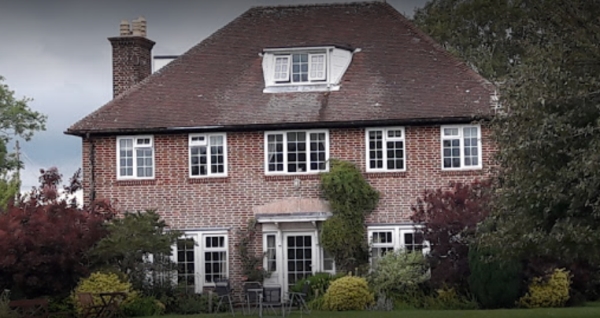
We recommend Glebe House. It’s a few minutes drive from Vobster Quay and a warm welcome is guaranteed. It’s a popular destination so we recommend booking early. You can read more about and find contact details for Glebe House at www.glebehouse.me.uk
You can also camp at Glebe House, which includes a full English breakfast to get you on your way on day two. If you don’t have a tent but wish to save money, then the owner will let you sleep in the classroom if you ask nicely!
Another local, low-cost option is the hostel at Larkshall, which is owned and run by the Cerberus Spelæological Society (us neither, but it means the study of caves). You can find out more at:
http://www.cerberusspeleo.org.uk/hut.htm
Other nearby accommodation includes:
- The Fromeway http://www.fromeway.co.uk/
- Jericho B&B, Mells stayatjericho.co.uk
- Edmund’s Stables, Upper Vobster www.stedmundstables.co.uk
- Holwell Farm, Mells holwellfarm.co.uk
- Vobster Inn, Lower Vobster vobsterinn.co.uk
- The Bell Inn, Buckland Dinham bellatbuckland.com
- The Old Bath Arms, Frome theoldbatharms.co.uk
- The George Hotel, Frome georgehotelfrome.co.uk
Have you tried your FREE Breathing Optimisation Class yet? Want More?
Check out Emma’s weekly (and monthly) breathing classes. Not only will these classes help your freediving, but will also improve relaxation, sport performance and water confidence.
Breathing Optimisation Classes and Mammalian Dive Reflex Classes
Breathing Optimisation Classes
These classes are live and run every Tuesday evening and Thursday. You can attend classes as a single session or come every week!
Improve your breath hold and lung function, and improve your freediving.
The Breath Hold Optimisation Classes are based on the programme Emma devised for Olympic and Paralympic athletes across cycling and swimming, and have been used successfully since 2010.
The exercises are designed to teach you how to breathe fully and efficiently, improve CO2 tolerance, increase breath hold capacity, increase Vital Capacity, decrease Residual Volume and improve diaphragm flexibility.
Emma’s program uses techniques from yoga, freediving and the Buteyko method, and have been proven to improve lung function and performance.
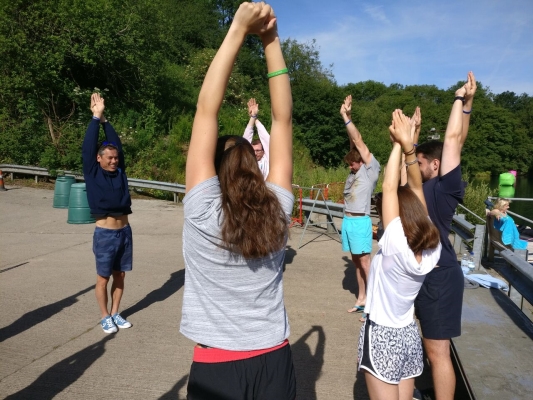
Mammalian Dive Reflex Classes
These classes are live and run once a month.
Join our monthly MDR activation class to experience the Mammalian Dive Reflex in action.
The class starts with upper body stretches, and a calming breath exercise. We then move to a series of one minute holds with one breath in between, designed to stimulate bradycardia and peripheral vasoconstriction.
It’s an incredible way to stimulate the dive response as well as view progress in apnea capacity and mental strength. The class is adaptable to complete beginners as well as elite freedivers so suitable for all levels.
By now you should have:
- Made us a safe sender on your email account
- Registered for your FREE Breathing Optimisation Class (optional).
- Submitted your Kit requirements and next of kin details
- Completed all of your medical and admin paperwork
- Registered with Vobster and Registered with RAID to access your course materials
- Sorted accommodation and any additional classes you may want to take before your course
A few reminders for your course
1. What you need to bring

For the confined water element of the course, you will need to bring the following:
- Swimsuit
- Towel
For the open water element of the course, you will need to bring the following:
- Lanyard
- Swimming costume
- Hair conditioner or shower gel (even the men) It’s a useful lubricant to help you slip in and out of your freediving wetsuit. We will provide conditioner but you may prefer to use your own.
- Towel The purpose of which should be obvious, but please don’t bring the one from your accommodation.
- A razor (men only) Many men have found that stubble on their upper lip prevents a watertight seal forming between their mask and skin, enabling water to leak into their mask. Being clean shaven can massively help to prevent leakage.
- A water bottle – You can get surprisingly thirsty when you’re in the water all day, so make sure you have something to help you stay hydrated.
- Warm clothes and hat – It’s important you stay warm between sessions in the water, as we’ll be spending a lot of time outside so warm clothes and a hat are essential, even if the weather forecast is warm.
- Sunscreen in case of sunny weather – You can quickly get sunburnt without noticing when you’re in and out of the water, especially as your face is exposed in a wetsuit.
- Underwater camera – This is optional but there will be chances for you to take pictures and videos on your dives as you become more comfortable in the water.
- Vaseline – If you have a beard, you will need a good seal for your mask. Vaseline or equivalent is essential!
- Food/snacks (or money for same) There is a catering facility on site that sells a variety of food and drinks, but you can also bring your own food on site if you prefer
2. Arrive for your Pool session early
We only have the pool for two hours, so it is imperative students are changed AND poolside at least 15 minutes before the confined water section of the course commences.
3. Arrive and Start Queuing Early for Vobster!
We cannot emphasise this enough
The queue to get into Vobster is notoriously long. Students have even mistaken it for a car park! We often arrive over an hour before our students arrive and are still in a queue of over 15 cars!
If you see ANY CARS PARKED TO ONE SIDE OF THE ROAD, PLEASE ASSUME THIS IS THE QUEUE. PLEASE DO NOT DRIVE PASSED IT TO TRY AND GET INTO THE CENTRE. THE QUEUE IS NOT THE CAR PARK.


As there is a registration process at Vobster, where you need to sign in and receive your wristbands (we are not able to do this on your behalf), we need you to ARRIVE AT LEAST ONE HOUR BEFORE THE START OF YOUR COURSE. Your time spent in your car will not be wasted, as we will use this time to issue your mini quizzes and allocate your kit.
The later you arrive, the more scuba divers and swimmers ahead of you in the queue will need to be registered and processed by Vobster staff, meaning you could end up joining the course late and missing valuable course information.
3. Course Times:
Advanced course times:
Saturday: 2pm – 8pm (Vobster Quay)
Sunday: 9am – 12:30pm (Downside School Pool)
Sunday: 2pm – 8pm (Vobster Quay)
4. FAQs
Please scroll down the main joining instructions page for even more information about your course, preparation you can do, and some further reading you may find useful! Also, don’t forget to take advantage of the tutorial library we have created for you on the right of the page.
See you very soon!
Emma and the Go Freediving Team!
RAID Advanced Freediver Course Video Tutorials
These videos have been prepared by our instructors and are specifically tailored to your RAID Advanced Freediver course. The full series from the RAID course on the right of this page.

Breath hold practice
One of the core skills you’ll learn on your course is how to safely hold your breath. You can get a head start on this at home, with the following practice techniques. These will get your body and mind used to the physiological and psychological effects involved in holding your breath, making you better prepared for your course.
Please note: Under no circumstances should you practice breath holding in water without professional safety instruction from a qualified instructor and the presence of a buddy experienced in freediving safety, rescue, CPR and first aid.
- Get a watch with a second hand or timer and find a quiet room in your home.
- Lie down on the bed/sofa/floor and make sure that you’re comfortable.
- Close your eyes and place one hand (it doesn’t matter which) on your abdomen, just below your belly button. Place your other hand on your chest, just below your collarbone.
- Breathe in and out gently through your nose so that the hand placed on your abdomen moves up and down. Breathe in for a slow count of two and out for a slow count of three.
- Use your watch to time yourself for one minute and get used to the sensation of your abdomen rising and falling.
- Now start pausing for a second at the end of every exhalation. Take another minute to get used to this.
- When you’re ready for your first breath hold, exhale every last bit of air from your lungs before breathing in gently and as deeply as possible, filling your lungs again.
- Hold that breath for no less than 30 seconds but no more than 1 minute.
- Try to relax and concentrate on how your body responds.
- At the end of the hold, breathe out and then take three quick, deep recovery breaths through your mouth.
- Rest for 2 minutes and breathe gently through your nose again.
- When you’re ready for your second breath hold, exhale every last bit of air from your lungs before breathing in gently and as deeply as possible, filling your lungs again.
- Hold that breath for 15 to 30 seconds longer than you did the first, noticing the changing response from your body.
- At the end of the hold, breathe out and then take three quick, deep recovery breaths through your mouth.
- Rest for 2 minutes and breathe gently through your nose again.
- When you’re ready for your third breath hold, exhale every last bit of air from your lungs before breathing in gently and as deeply as possible, filling your lungs again.
- Hold that breath for 15 to 30 seconds longer than you did the second, noticing the changing response from your body.
- Breathe out and recover as before. Breathe normally for 1 minute before ending the practice and standing up.
If you found the second and third breath holds difficult, try reducing their duration. If they were easy, try extending them by another 15 seconds the next time you practice. You can keep increasing the time you hold your breath until it becomes too difficult. At that point, stick with a duration that you’re comfortable with.
You should be pleasantly surprised by how long you can hold your breath for – most people find they can hold their breath for far longer than they had initially thought. The key is to stay relaxed, listen to your body and to not strain or force your breathing or holding.
Keeping calm while you hold your breath for very long can be challenging but there are several ways to distract your mind from the fact that you’re not breathing. Try them out to see which one works best for you, or feel free to experiment with your own techniques. Some that other people have found useful include:
- Counting slowly (down and up)
- Slowly repeating the alphabet
- Visualising all the details of a place in which you feel comfortable, such as your bedroom
- Visualising a walk through your house or place you know well, noticing what’s in each room as you pass through
- Imagine a white light flooding through your body from your head down to your toes
- Imagine roots growing from the soles of your feet down into the ground

Equalisation techniques and exercises
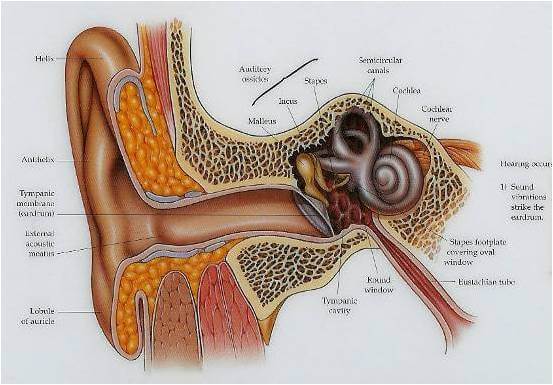 The further you dive underwater, the greater the pressure becomes on the airspaces in your body. You’ve no doubt noticed this when swimming underwater in a swimming pool, where the airspaces in your ears are squeezed.
This pressure on your ears needs to be equalised in order for you to dive comfortably and avoid injury. After holding your breath, learning how to equalise is the second most important freediving skill you can acquire. As a result, difficulty equalising is the biggest factor preventing most freedivers from increasing the depths they can reach.
Fortunately, equalisation is something you can practice out of the water, enabling you to get a grasp of what’s involved before your course. We’ve detailed two equalisation techniques below. Some of the guidance might sound difficult, but don’t worry if you struggle – we’ll give you one-on-one instruction on the course before you get in the water.
Here are three articles that may also help:
https://gofreediving.co.uk/equalisation-tips
https://gofreediving.co.uk/definitive-guide-frenzel-technique
https://gofreediving.co.uk/the-beginners-guide-to-freediving
The Valsalva manoeuvre
This is the method of equalisation that most scuba divers use: You pinch your nose tightly closed and try to blow out through your nostrils. The increased pressure in your chest causes air to move via the eustachian tubes to the middle ear. If you try this, you should be able to feel increased pressure in your ears and maybe a popping sensation as your eardrums expand outwards. Don’t practice this out of the water for too long or too forcefully as it is possible to injure yourself. If you can feel your ears equalise the first time you try this, move onto the Frenzel technique.
The Frenzel technique
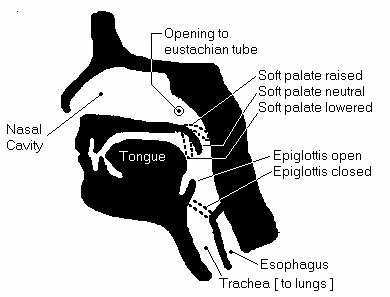 This method of equalisation is the one preferred by freedivers and the one we teach on Go Freediving courses. You are still moving air into your Eustachian tubes with a pinched nose but the pressure increase is generated in your mouth, rather than in your chest, by using your tongue to ‘pump’ or squash air up against the roof of the mouth.
- Pinch your nose.
- Close your throat.
- Put the tip of your tongue behind your top front teeth.
- Try making a ‘kuh’ sound.
- The back of your tongue should move towards the roof of your mouth and your Adams apple should rise (try practicing in a mirror).
If you try this while only lightly pinching your nose you should notice a small amount of air escaping through your nostrils.
Other equalisation techniques
Swallowing, thrusting the jaw forward and tilting the head forward can also aid equalisation and are mostly used by people on airplanes as they descend. When freediving they should however, for the majority of people, be an adjunct to the techniques above, not the primary mode of equalisation.
Exercise and stretching
One of the most compelling aspects of freediving is that almost anyone can enjoy it – you don’t need to be at the peak of physical fitness in order to do it. Moderate exercise, however, and an above-average level of fitness will help you make the most of your time on the course.
Stretching
The more your body is open, supple and relaxed, the easier you’ll find it to move through the water, equalise and avoid cramp. We’ll cover some stretching and warm-up exercises on the course but you want to start improving your flexibility now. Emma has recorded a series of videos on YouTube that will take you through a stretching routine designed to help with freediving. You can see them online at https://www.youtube.com/playlist?list=PLInrIo55wXw4gyVJgQacwk2aKyAp934w-
These stretches are only a guide; there are many more you can do, but the most important thing is to listen to your body and not strain yourself.
Also, don’t forget to watch our stretching tutorial in our video tutorial library!
Diet
 Believe it or not, but the food and drink you consume in the days leading up to the course can have a big effect on your ability to freedive. As you continue your freediving journey you’ll soon learn which particular foods and drinks have the biggest impact on you. Some people find that they can eat and drink whatever they want while others will abstain from certain items in the days before they dive.
Some of the most common foods and drinks are listed below. If any are problematic (we know several people who can’t function adequately without at least a couple of cups of coffee in the morning), don’t worry – it’s more important on the course that you’re relaxed and able to enjoy yourself
At least five days before taking the course, try to avoid the following foods and drinks:
- Dairy products (milk and cheese in particular)
- Wheat and gluten containing foods (pasta, bread, pastry and so on)
- Sugar and any food containing sugar (whole fruit is fine)
- Caffeine (if you decide to give up caffeine, ensure that you do this at least a week before or you’ll feel terrible during the course)
- Alcohol
These foods and drinks can contribute to mucus formation in your sinuses and aggravate the membranes in your nose and throat, negatively affecting your ability to equalise underwater. They can also cause inflammation in the body. Additionally, caffeine and sugar are stimulants that can raise your metabolic rate and blood pressure, shortening the duration of your breath holds.
However please don’t feel that you need to make any radical changes in your diet and lifestyle in order to be a successful freediver!
Further Reading
If you’re interested in learning more about freediving, either before or after your course, here are some books worth reading.
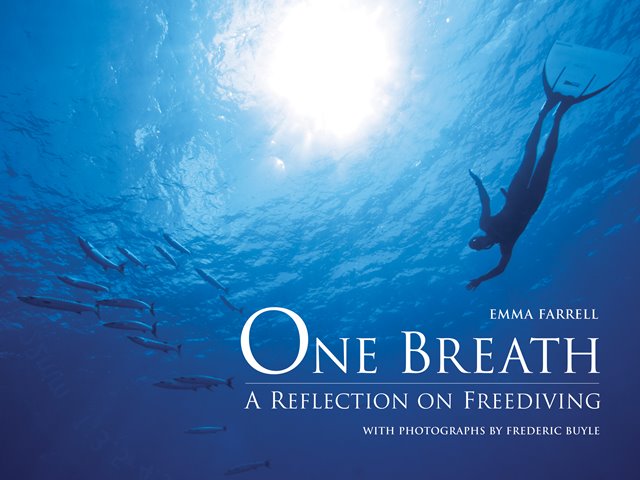
One Breath – A Reflection On Freediving
Written by Emma Farrell and published by Pynto ISBN 09542 3152X
Available here (signed copies will also be available on your course)
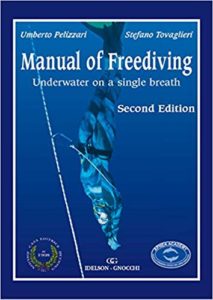 Manual of Freediving
Written by Umberto Pelizzari
and Stefano Tovaglieri
and published by
Idelson Gnocchi
ISBN 19286 49270
A complementary discipline, yoga is a great way of improving your freediving.
There are various schools of yoga but we recommend Iyengar yoga.
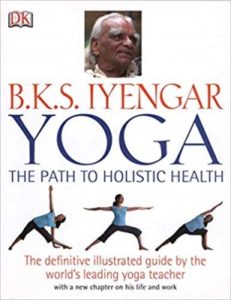
Yoga – The Path To Holistic Health
Written by B. K. S. Iyengar and published by Dorling Kindersley
ISBN 07513 26172
.
Are there any other prerequisites for advanced courses in freediving?
Yes. Almost all advanced freediving courses will require you to complete a first aid certificate in CPR, First Aid and Oxygen Administration (it is perfectly acceptable for you to undertake the course through any workplace scheme or St John’s Ambulance course etc).
You will also need to complete a standard self-assessing medical questionnaire.
What extra things will I be able to do if I do an advanced course in freediving?
Your theoretical knowledge will increase. Also, you will be expected to dive at greater depth (For our RAID freedivers, the maximum depth is 20m, for advanced students this jumps to 30m). You will also be expected to perform additional skills and rescue scenarios with greater competence and at greater depth.
Gaining an advanced certification means you will be permitted to dive at greater depths when on holiday or if you join a freediving club.
Is the course difficult?
Many students who take advanced courses in freediving express how much more difficult the course was, than expected. However, this makes passing the course even sweeter when you know you have truly worked for it. The course will be more difficult for some (some students were clearly fish in a previous life and will sail through). What should be remembered is that each course is your own personal journey. The learning and skills will come with practice and confidence – persistence really is key. Plus, you will find you have renewed respect for fellow advanced and master freedivers!
Is there any training I can do before the course to help prepare?
Please see the information above. We have exercises, videos and heaps of information to ensure you are as prepared as possible. However, if you have not dived for a while, we do recommend booking one or two returning student sessions to ensure you feel confident and relaxed when your course arrives.
We also recommend attending a weekly breathing optimisation class in the lead up to your course (if you book, but can’t make a class, we still send you a recording so you never miss your training).
If you want some extra reading, our blog offers a wealth of information, from yoga and breathing to diet and equalisation tips! Just use the search field to find a topic that interests you.
I paid a deposit, how do I pay the balance?
The balance of your course must be paid no later than 1 month prior to course
To pay your balance, please use these BACs details:
HSBC
Go Freediving Limited
40-09-19
02587378
Amount:
Ref:RAIDbal[date]
I’ve registered on the RAID site, but I can’t find my course. What does this mean?
When you register on the RAID site you must nominate Go Freediving as your dive centre. This will prompt an email notification from RAID to us so that we can gift you your course. Occasionally, that message doesn’t arrive with us, so if after registering and 48 hours have lapsed, the course has not been allocated to you, just get in touch via info@gofreediving.co.uk and let us know. We can then issue your course manually for you.
What if I say ‘Yes’ to one of the Medical Questions. Does this mean I can’t do the course?
If you have answered yes to one of the medical questions, this means you will need to ask your local GP to complete the form indicating you are fit to take part in the course. Your signed medical form will then be valid for 6 months. We recommend asking your GP to add a ‘Valid Until XXX’ (preferably 1 – 2 years) so that your medical certificate’s life is extended at no extra cost.
Some students see the question ‘Are you over 45?’ and believe this means they need a Doctor to sign them off. However it is a preliminary question, you have to be over 45 AND meet an additional condition listed further down.
What do I need to bring?
As well as the originals for the four signed documents (mentioned the joining instructions) essentials you will need to bring include a swimsuit, towel, hair conditioner or shower gel and warm clothes, food (if you do not want to buy food from the catering facility) and your Vobster entry fee for each day. Everything else is provided.
Should I eat before attending the course?
Most definitely!
Freediving can be surprisingly strenuous and we have seen several students who have underestimated the importance of eating, sit out during dives after feeling unwell or light-headed simply because they have not eaten sufficiently before attending.
Please ensure you eat a substantial, energy-filled meal and are well hydrated approximately 2 – 3 hours before attending the start of the course. Also, bring nutritious energy-filled snacks. If you are bringing your own packed lunch, ensure you have plenty of food and liquid to keep your energy levels up.
What kit is provided?
We provide all kit – fins, mask, snorkel, wetsuit. You should not need to bring anything. If you already have kit, you would be welcome to bring that along. We also sell kit, which you can purchase in advance or on the day.
I have my own wetsuit, should I bring that?
Provided your suit is 3mm – 5mm thick it may be suitable. We do recommend bringing your wetsuit if you have one, as you may find this fits you better. Don’t worry if you don’t – we have a very broad selections of wetsuits and should be able to accommodate all shapes and sizes.
Can my friends/family come to watch?
Due to changes following COVID Vobster Quay have very strict requirements in relation to access on the site. These are changing constantly in line with government advice, so we would advise you to contact Vobster directly for guidance.
How can I contact you if I am late, delayed or am unable to attend?
If you need to contact us before the day of the course, please contact info@gofreediving.co.uk.
If you need to contact us URGENTLY (for example, within a few hours of the course), please call +44 (0)7980 648 892
I need to change the date of my course, can I do that?
If you need to change your course date, we can help with that, however, there will be a rescheduling fee. Please familiarise yourself with the terms and conditions for further details.
Your course times are as follows:
Saturday: 2pm – 8pm (Vobster Quay)
Sunday: 9am – 12:30pm (Downside School Pool)
Sunday: 2pm – 8pm (Vobster Quay)
Venue Addresses:
Downside School,
Stratton-on-the-Fosse,
Radstock, Somerset,
BA3 4RJ
Vobster Quay,
Upper Vobster,
Radstock,
BA3 5SD
RAID Tutorial Library
Your Tutorial library is a collection of videos created by our instructors to enhance your preparedness and make your course even more enjoyable. These videos are not compulsory, though we do recommend watching them, particularly video 3.
The below collection is for RAID Freediver students, but worth watching before you watch your Advanced course videos. You will find your RAID Advanced Freediver video tutorials on your main joining instruction page,